

How To Edit Youtube Videos On Windows
How to Edit YouTube Videos Easily

When information technology comes to YouTube, we all desire our videos to expect equally good as possible, as they're exposed to so many viewers. Just at that place'due south always the problem of decent video editing. Until last twelvemonth, YouTube provided a elementary and convenient online video editor that you could utilise non just for basic editing, only also to assemble complete videos from multiple clips. Information technology was a great solution for inexperienced users, but YouTube dropped it at the end of 2017, leaving only the Creator Studio with only a few enhancement editing features.
So what's left for a user who wants to do some basic editing merely doesn't want to get bogged down in technical complexities? The best solution here might exist to find a user-friendly video editor that has the aforementioned features and is capable of much more, for example Movavi Video Editor. Let's have a look at the current land of YouTube Creator Studio and also meet what Movavi'southward plan can practice.
How to Edit Video with the YouTube Video Editor
YouTube's Creator Studio lets you make some specific changes to your uploaded video, including the sound track. In terms of video enhancement, there are just two functions available for editing your video – trimming and blurring. So permit's see how to employ these functions.
Trimming Video
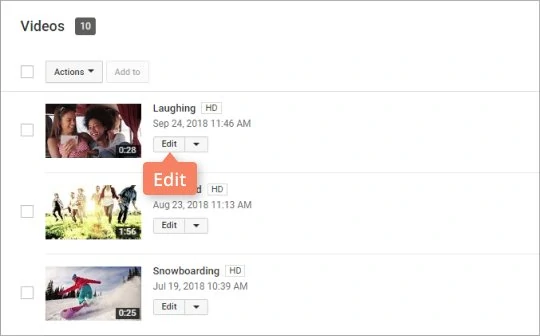
In the Creator Studio carte du jour, choose the video yous want to alter and click Edit.
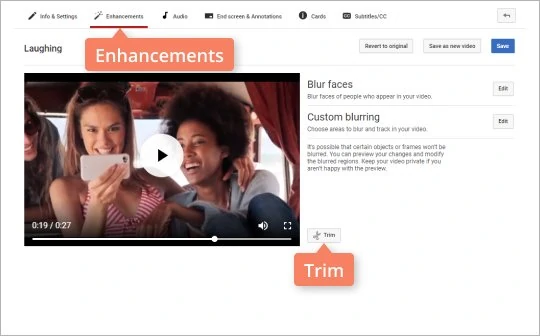
Open the Enhancements tab and striking the Trim button. This part lets you shorten the video from each end or split it into multiple parts and cut out the unimportant pieces.
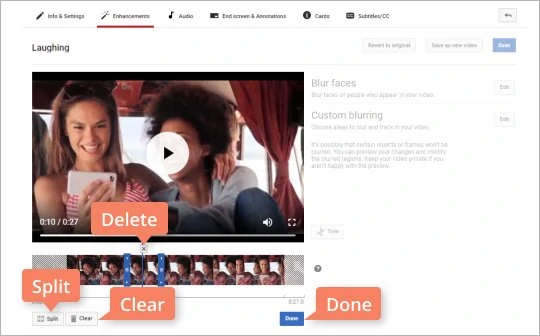
Simply drag 1 or both ends of the video towards the middle on the timeline to shorten information technology. If you want to cut out a fragment that is somewhere in the eye of the video, just identify your marker at the beginning of that department and striking Dissever. Find the ending of the section and practice the same. So select that segment and click the Delete push button to a higher place information technology. When y'all're done trimming, click Done. To abolish the edits, hit Clear.
Adding a Blur Result
The second function you tin apply is the Blur upshot. The editor enables you to either mistiness all the faces in the video or apply this consequence only to a certain surface area.
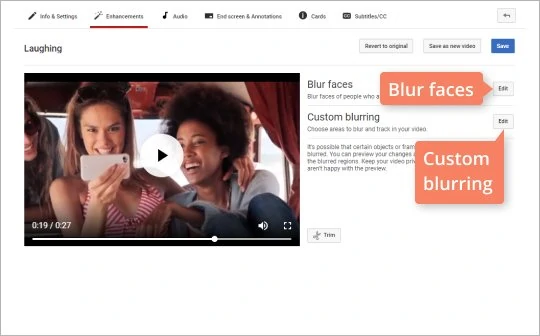
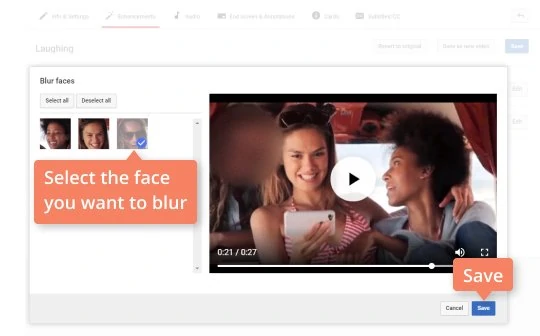
To blur faces, click the appropriate Edit button and wait for the editor to process your video. Y'all volition be shown the faces you can choose to blur. Select those y'all desire to blur and click Salve.
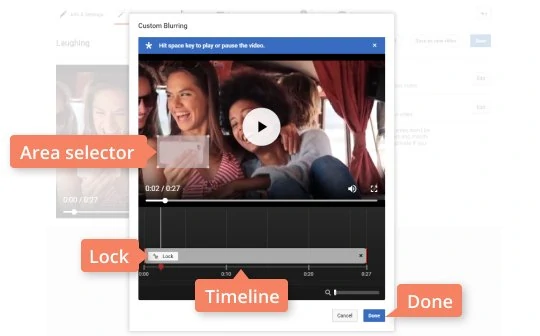
If y'all need to blur something other than a face up, cull the Custom blurring option and click Edit. The video volition start playing automatically, so press the Infinite bar to suspension when y'all see what you want to mistiness. Then click your left mouse push button anywhere on the video to display a rectangular surface area selector. Yous tin movement and change the size of the selector to frame the object you lot want to blur. Later you choose the area, you can click Lock if you lot want to go on the area selector in one position, otherwise information technology will automatically follow the selected object throughout that unabridged section of the flick. To set the desired duration, simply drag the ends of the selector on the timeline. Yous are free to blur more than one spot. When everything is ready, click Done.
It is important to note that, depending on the video, this blurring event may not always work correctly, so be sure to review the final consequence earlier saving the changes.
Working with Sound
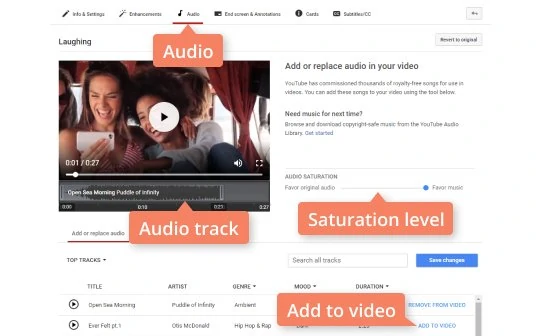
Besides as editing video, Creator Studio enables you to work with audio. The app includes a costless library of music tracks to match the mood of whatever video. If you lot are not satisfied with the original sound of your prune, or you want to layer some music on top of it: simply observe an appropriate track in the list and click Add to video. Y'all can also trim the music added, and prepare the saturation level if y'all want to hear the original audio besides.
As y'all can encounter, YouTube still provides some basic adjustment functionality, but information technology's far from a total-diddled video editor. You lot cannot work with multiple clips, add more than one audio runway, or utilise transitions and special furnishings. You can only make pocket-sized edits to one specific video and that's information technology. So it'due south a skillful idea to take a wait at convenient YouTube video editing software that offers more useful features.
How to Edit Video Using Movavi Video Editor
Movavi Video Editor is a feasible alternative – it'southward a powerful yet easy-to use editing app that's an effective replacement for the YouTube video editor. You tin use information technology to combine or cutting clips, add music, filters, text, and transitions to create ane-of-a-kind videos. Download Movavi Video Editor for Mac or Windows and follow this simple guide to start creating high-quality videos right abroad!
Install Movavi'southward Video Editor for YouTube Movies
Open the downloaded file and follow the instructions to install the programme on your PC or Mac.
Open Your Video Files
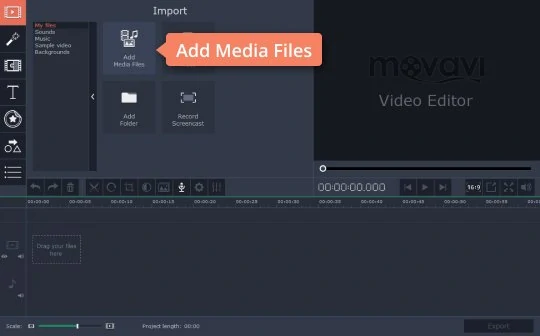
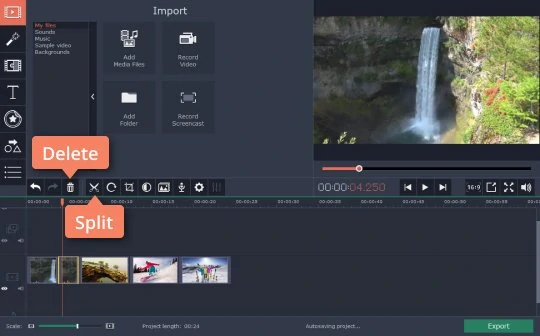
Afterwards yous've launched the program, choose New Project in the welcome window. And so click Add Media Files and select all the videos and pictures that you want to use.
Cut and Trim Your Videos
If you want to split a video into two or more parts, select the file on the Timeline and motion the marker to the identify where you want to make the first cut. Then click the Separate icon. Repeat the process as many times every bit you lot need. To delete a certain segment, merely select information technology and press Delete on your keyboard or click the Trash can icon.
If yous need to trim your clip, click the file on the timeline and just elevate the edges towards the middle.
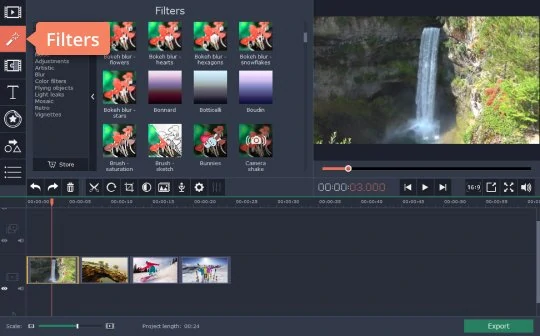
Add together Special Effects
The first affair yous tin can do to have your video to the side by side level is to add some special effects. Click the Filters tab and choose the effects you like best from the huge library. Unlike Creator Studio, which only offers blurring, Movavi Video Editor boasts multiple effects and filters to adapt any taste. The Blur upshot is also available in Video Editor and can be used equally a filter with more than than fifteen unique presets. To apply an effect, drag it to the video segment you want to apply it on. If yous want to use the same effect on all your clips, simply click on the desired result with the correct mouse button and choose Use to All Clips. To remove an consequence, click on the Star icon on the video clip to come across a listing of the effects you used on this clip. Choose the issue yous want to delete and click Remove.
Insert Transitions
It's always a good idea to add transitions between clips, it'll make your video more dynamic and professional. Open the Transitions tab, select the styles you desire to apply, and identify them between your video clips on the timeline. Double-click the transition in the working area and set the desired duration in the window that opens.

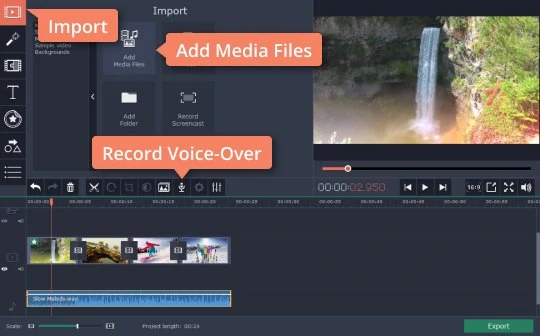
Add together Music
If yous want your video to attract viewers, it'due south important to consider the soundtrack. You can add a music track or fifty-fifty a voiceover. To add together an audio file, click Add Media Files in the Import tab or simply drag your music onto the timeline straight from a binder on your computer. If you lot program to brand a vlog or just tape your voice, just click the Microphone push in a higher place the timeline. You'll be able to choose the recording device, set the quality and volume. Click Start Recording to brainstorm recording your voice then End Recording when y'all're done.
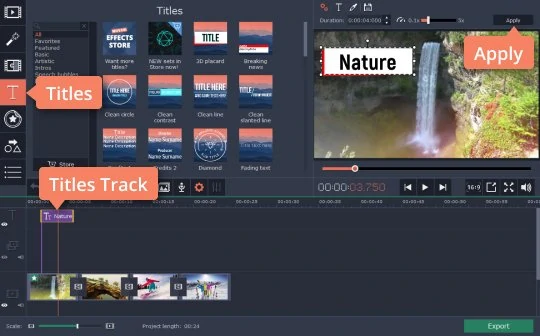
Add Titles, Callouts and Stickers
Adding text to the video is a bones yet important feature. Choose the Titles tab and find a style that fits your video. Elevate the selected title down to the timeline and place it on the special Titles Runway. To enter text, double-click the title and type your text in the preview window. Here, you tin as well edit other title parameters such every bit font, colour, speed, and duration. The selected text or any other overlaid object can likewise be moved and changed in size. Click Utilize to save the results.
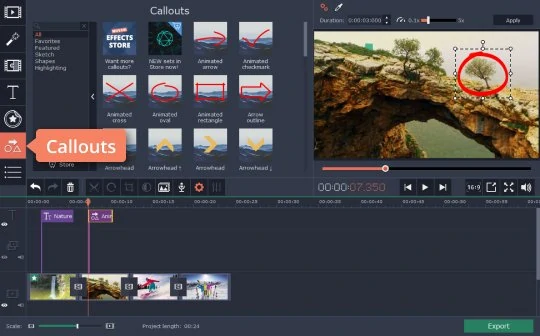
In addition to adding text, you tin can likewise add different graphic symbols: speech communication bubbles, arrows, or some geometric shapes, which can be helpful if you're making a tutorial or an educational video. Open the Callouts tab, cull the one you lot similar and drag in to the timeline. Double-click the callout; in the preview window, you'll be able to set the duration, speed and colour.
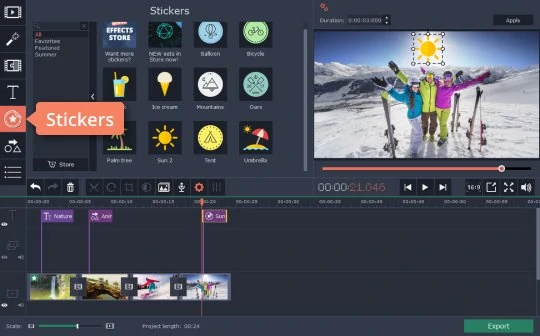
Another set of objects you lot tin overlay is Stickers – these tin can brand any video more than interesting and engaging. Cull the sticker y'all like and place it on the Titles Track. Double-click the sticker so you can move it within the frame, change its size, and set up the elapsing in the preview window.
Save and Upload Your Video to YouTube
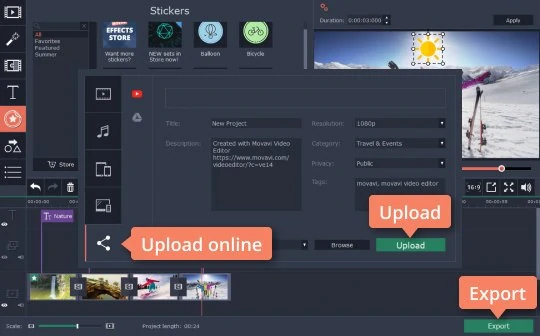
Now that your video is complete and gear up to be shared, it's time to upload it to YouTube. Click the Export button and select the Upload online tab. Now sign in to your YouTube account using the Sign in button; add a title, description, and other information nearly your video, set the desired resolution and select the folder for the exported re-create of the video. Click Upload and bask the consequence!
Now y'all know how to edit your YouTube videos using the Creator Studio and Movavi Video Editor. The Complimentary YouTube editor provides only a few editing features and may be non enough for full video montage. In this case, Movavi's software is a convenient and effective alternative that is every bit useful for beginners and advanced users alike, providing more flexibility and functionality.
Movavi Video Editor Plus
Your next pace in video-making
-

Edit video clips, images, and audio on a timeline
-

Add transitions, filters, titles, and stickers
-

Breathing objects using keyframes, apply more built-in media
-

Export videos in whatsoever popular format
* The gratis version of Movavi Video Editor Plus has the post-obit restrictions: 7-day trial period, watermark on the output videos, and, if you're saving a projection as an sound file, an ability to save only half the sound length. Acquire more
Oft Asked Questions
Can I edit someone else's YouTube video?
No, YouTube does not back up such a characteristic. Editing someone else'south YouTube video is illegal, as every video represents the content its publisher owns all the rights to, including publishing, sharing, and monetizing that content. The but things y'all can do with someone else's video on YouTube is to like/dislike it, share it, report it, or add it to your playlist.
How can I edit my YouTube video description?
To edit the championship and the clarification of your video, simply go to the YouTube Studio page for your account and choose the Videos tab. So, just find the video you need to edit and click on it. On the side by side page, yous'll exist able to edit the title and description, modify thumbnail, add together tags, and more.
If you need to change the channel description as well, click on your profile photo in the superlative correct and choose My Aqueduct. On the page that opens, click Customize Aqueduct. On the About tab, you'll be able to add to or edit the aqueduct description.
Tin can I edit the audio of a video on YouTube?
As nosotros mentioned before in the guide, the only style to change the audio rail in the Creator Studio is by overlaying another piece of music. If you're not happy with the original soundtrack of the video, open the Audio tab, add a music track from the library, and move information technology on the timeline if needed. Tweak the Sound Saturation slider to find the right residual between the new track and the original audio.
See other useful how-to guides
Source: https://www.movavi.com/support/how-to/edit-youtube-videos.html
Posted by: farlowatuddrefould.blogspot.com
0 Response to "How To Edit Youtube Videos On Windows"
Post a Comment